
Here are 3 easy ways to have a better cup of morning coffee freshly ground coffee is just one of them! But even with your premium beans, you won’t get the most out of them if your coffee grinder is caked with old coffee oils, bits and particles. Learning how to clean a coffee grinder is an essential part of maintaining both the quality of your coffee and the performance of your equipment.
Some of us might go nuts over the pricest beans, tweak their pour-over style but utterly ignore the most important tool of our coffee paraphernalia – the grinder! Stale old coffee grinds mixed with Rancid coffee oils and that very fine, powdery residue lodged deep down can wreak havoc in our coffee. Get into the routine of cleaning the grinder once in a month if you are using it daily to avoid clogging and reducing mechanical stress, as well as enhancing the flavor of your brew.
Whether you own a simple blade grinder or a precision burr grinder, this guide explains how to clean a coffee grinder safely, how often you should do it, and the best practices for keeping it in excellent condition.
Why Cleaning Your Coffee Grinder Matters
Every time you grind fresh coffee beans, tiny particles and naturally occurring oils are produced. Even though these natural oils give the fresh coffee a wonderfully appealing fragrance, they will slowly oxidise when they’re introduced to the air.
As residue builds up inside the grinder, several problems can develop:
- Coffee may begin tasting bitter or stale.
- Old grounds mix with fresh beans.
- Grinding consistency may decrease.
- Burrs or blades may become less efficient.
- Fine particles can clog moving parts.
- Strong flavors from flavored coffees may linger.
Routine cleaning removes these deposits before they affect both flavor and grinder performance, especially when following coffee equipment maintenance tips.
Understanding the Different Types of Coffee Grinders
The cleaning process depends largely on the type of grinder you own.
Blade Grinders
Blade grinders use a rapidly spinning blade to chop coffee beans into smaller pieces. They are generally affordable, compact, and easy to use. If you’re wondering how to clean a coffee grinder, blade models are usually the easiest to maintain because of their simple grinding chamber. Even so, coffee oils and fine grounds can gradually build up around the blades and interior walls, making regular cleaning important for consistent performance and fresh-tasting coffee.
Burr Grinders
A Burr grinder operates by crushing whole beans between two extremely close metal burrs. It is popular with coffee enthusiasts because the resulting even grind properly extracts the flavors from your coffee. Burr grinders also have more internal parts than other types of grinders, therefore, require a bit more effort to clean.
Manual Coffee Grinders
The burrs also show up in a hand manual hand grinder; because it relies on a hand crank and a handle, not electricity, the hand manual electric coffee grinder has very few electrical components and, just like the electric grinders, the coffee grounds oil and fine grind will get into the grinder burrs over time and requires cleaning.
How Often Should You Clean a Coffee Grinder?
The ideal cleaning schedule depends on how frequently you use the grinder.
| Usage | Recommended Cleaning |
| Daily use | Brush out loose grounds after each use and perform a deeper cleaning every 1–2 weeks. |
| Several times per week | Deep clean approximately once a month. |
| Occasional use | Clean before long-term storage and after extended periods without use. |
| Grinding flavored coffee or spices | Clean immediately afterward to prevent flavors from transferring. |
Heavy users may benefit from more frequent cleaning, especially if they use dark roast coffees, which tend to leave behind more oils.
Signs Your Coffee Grinder Needs Cleaning
Sometimes your grinder tells you it’s time for maintenance.
Watch for these signs:
- Coffee tastes stale despite using fresh beans.
- Grind size becomes inconsistent.
- Grounds remain inside after grinding.
- The grinder produces unusual noises.
- Beans feed more slowly than usual.
- Oily residue is visible inside the hopper.
- Strong odors remain even after emptying the grinder.
Ignoring these signs can gradually affect both coffee quality and grinder performance.
Tools You’ll Need
Cleaning a coffee grinder does not usually require specialized equipment.
Useful items include:
- Soft-bristle cleaning brush
- Microfiber cloth
- Wooden toothpicks or cotton swabs for tight areas
- Mild dish soap (for removable, washable parts only)
- Warm water
- Vacuum with a small brush attachment (optional)
- Grinder cleaning pellets (optional, if recommended by the manufacturer)
Always consult your grinder’s user manual before using water or cleaning products on removable components.
Before You Begin
Regardless of the grinder type, start with these basic safety steps.
- Unplug the grinder if it is electric.
- Empty all remaining coffee beans.
- Remove loose coffee grounds.
- Allow recently used grinders to cool if they became warm during operation.
- Review manufacturer instructions for removable parts.
Never immerse the motor base of an electric grinder in water.
How to Clean a Blade Coffee Grinder
Blade grinders have fewer components, making routine maintenance relatively simple.
Step 1: Empty the Grinder
Pour out any remaining coffee beans and loose grounds.
Turn the grinder upside down and gently tap it to dislodge trapped particles.
Step 2: Brush Away Loose Grounds
Use a small cleaning brush to remove coffee particles around the blade and interior walls.
Pay close attention to corners where grounds often collect.
Step 3: Wipe the Interior
Using a slightly damp microfiber cloth, carefully wipe the inside of the grinding chamber.
Avoid excessive moisture around electrical components.
Step 4: Dry Thoroughly
Before using the grinder again, ensure every part is completely dry.
Moisture left inside may affect coffee beans or contribute to corrosion over time.
How to Clean a Burr Coffee Grinder
If you’re wondering how to clean a coffee grinder with burrs, the process takes a little more time but provides greater long-term benefits.
Step 1: Remove Beans
Empty the hopper completely.
Run the grinder briefly to clear any beans remaining between the burrs.
Step 2: Unplug the Grinder
Always disconnect power before removing any parts.
Step 3: Remove the Hopper
Many burr grinders allow the bean hopper to be removed.
If removable, wash it only if the manufacturer states it is safe to do so.
Dry it completely before reassembly.
Step 4: Remove the Burrs
This type of grinder is made in a way that you can do this process of taking the top burr off without needing tools. If you pull the top off, then you’ll see your coffee grounds under it, you get a lot clearer view this way. Don’t try taking apart anything in the grinder that doesn’t simply pull away or snap apart.
Step 5: Brush the Burrs
Using a soft brush, carefully remove coffee particles from:
- Upper burr
- Lower burr
- Burr housing
- Grind chute
Avoid using metal tools that could damage precision burr surfaces.
Step 6: Clean the Grind Chute
Coffee fines tend to collect in the chute on their way to the grounds container.
A slender brush or a cotton swab will efficiently clean out this space.
After all areas have been wiped clean and dried, put the machine back together following manufacturer’s directions.
Test the grinder on a bit of coffee before brewing your first cup.
Step 7: Reassemble the Grinder
Coffee fines tend to collect in the chute on their way to the grounds container.
A slender brush or a cotton swab will efficiently clean out this space.
After all areas have been wiped clean and dried, put the machine back together following manufacturer’s directions.
Test the grinder on a bit of coffee before brewing your first cup.
Can You Use Rice to Clean a Coffee Grinder?
One commonly suggested home remedy involves grinding uncooked rice.
While this method has circulated for years, many grinder manufacturers discourage it, particularly for burr grinders. If you’re researching how to clean a coffee grinder– Something you might not realize is that uncooked rice can actually be pretty bad at cleaning coffee grinders. Uncooked beans are much more brittle and harder than the roasted kind and can break burrs, grind away the motor, and leave behind a starch layer. It is typically much better to invest in a recommended grinder cleaner from the manufacturer of your model.
Common Mistakes to Avoid
Knowing how to clean a coffee grinder also means understanding what not to do. These mistakes can reduce performance or even damage the grinder:
Using Excessive Water
Water and electric motors do not mix. Only wash removable parts if the manufacturer specifically allows it, and never immerse the motor base.
Using Harsh Chemicals
Heavy duty cleaners, bleach, and harsh abrasives can cause harm to your plastic components and leave behind odors or residue that impact the flavor of the coffee. Moisture in even the smallest amount of water will cause the coffee grounds to clump and even contribute to corrosion in metal pieces. Let components dry completely before you put them back together.
Forgetting to Dry Components
Heavy duty cleaners, bleach, and harsh abrasives can cause harm to your plastic components and leave behind odors or residue that impact the flavor of the coffee. Moisture in even the smallest amount of water will cause the coffee grounds to clump and even contribute to corrosion in metal pieces. Let components dry completely before you put them back together.
Scraping Burrs with Metal Tools
Metal objects can scratch or dull precision burrs. Instead, use a soft brush, wooden toothpick, or plastic cleaning tool.
Waiting Too Long Between Cleanings
Routine maintenance is much easier than removing months of hardened coffee oils and packed grounds. Regular light cleaning helps prevent stubborn buildup.
Daily Habits That Keep Your Grinder Cleaner
You don’t need a full deep clean after every use. A few simple habits can reduce buildup and keep your grinder performing well:
- Empty leftover grounds after each grinding session.
- Wipe the bean hopper occasionally with a dry microfiber cloth.
- Store coffee beans in an airtight container rather than leaving them in the hopper for extended periods.
- Avoid grinding oily, flavored beans unless your grinder is cleaned promptly afterward.
- Inspect the grind chute regularly for trapped coffee particles.
These small steps take only a few minutes but can make deep cleaning easier and help maintain consistent grind quality.
Deep Cleaning a Coffee Grinder
Routine brushing removes loose grounds, but every coffee grinder benefits from a more thorough cleaning from time to time. If you’re learning how to clean a coffee grinder, deep cleaning is an essential step because it reaches the hidden areas where coffee oils, fine particles, and residue gradually build up. Grinds consistency, taste and grinder lifespan are best sustained with regular deep cleans. The Frequency Will Vary “The frequency you should deep clean will again, depend a lot on how many cups of coffee you grind up on a regular basis,” said Gurn. “You’ll need to do a deep clean at least once a every four to six weeks for a coffee drinker who makes a few cups a day.”
How to Deep Clean a Burr Coffee Grinder
If you’ve been wondering how to clean a coffee grinder beyond routine brushing, a deep clean is the next step.
Step 1: Empty the Hopper Completely
Remove all coffee beans and run the grinder briefly to clear any remaining beans from the burr chamber.
Step 2: Disassemble Removable Parts
Most burr grinders allow you to remove:
- Bean hopper
- Upper burr
- Grounds container
- Hopper lid
Refer to your owner’s manual before removing internal components.
Step 3: Brush Every Surface
Use a soft grinder brush to clean:
- Upper burr teeth
- Lower burr teeth
- Burr housing
- Adjustment ring
- Grounds chute
- Exit spout
Small coffee particles often collect around adjustment mechanisms, so take your time cleaning these areas.
Step 4: Vacuum Loose Particles (Optional)
A small hand vacuum cleaner, or a vacuum brush attachment, will cleanly extract this residual coffee powder, without damaging any parts. Be cautious about blowing the powder out with canned air unless the manufacturer says to do so, especially indoors. You could blow the powder down into the burrs of the grinder.
Step 5: Clean Plastic Components
Wash removable plastic parts only if permitted by the manufacturer.
Use:
- Warm water
- Mild dish soap
- Soft sponge
Dry every component completely before reassembly.
Step 6: Reassemble Carefully
Incorrect burr alignment can affect grind consistency.
Follow the manufacturer’s instructions when reinstalling the burrs and adjustment mechanism.
Removing Coffee Oil Buildup
Coffee contains natural oils that gradually coat grinder surfaces.
Dark roast beans usually leave behind more oil than lighter roasts.
Over time, these oils:
- Become sticky
- Trap coffee dust
- Turn rancid
- Affect flavor
- Restrict bean movement
Removing these oils is one of the biggest reasons regular maintenance improves coffee quality.
For stubborn residue:
- Use a microfiber cloth.
- Wipe removable plastic parts.
- Brush repeatedly around burr teeth.
- Clean difficult corners with cotton swabs.
Avoid spraying cleaners directly inside the grinder.
Using Grinder Cleaning Pellets
Many coffee enthusiasts use grinder cleaning pellets designed specifically for coffee equipment.
These food-safe pellets pass through the grinder and help absorb:
- Coffee oils
- Fine particles
- Residue
They’re a popular choice for burr grinders because they remove buildup from internal surfaces that brushes can’t easily access.
However:
- Only use products approved for your grinder model.
- Always follow manufacturer instructions.
- Grind a small amount of coffee after cleaning to flush out any remaining pellet dust before brewing.
Should You Use Bread or Rice?
Various internet tips recommend grinding bread or uncooked rice.
While these methods remain popular online, they are not universally recommended.
Bread
Fresh bread may leave moisture and crumbs inside the grinder.
Dry bread produces less moisture but can still leave residue.
Rice
Rice has traditionally been suggested for removing oils.
However, many grinder manufacturers discourage using rice because:
- It is significantly harder than roasted coffee beans.
- It may stress burrs or motors.
- Rice starch can create additional residue.
When in doubt, use products specifically designed for coffee grinder cleaning rather than household substitutes.
Cleaning Manual Coffee Grinders
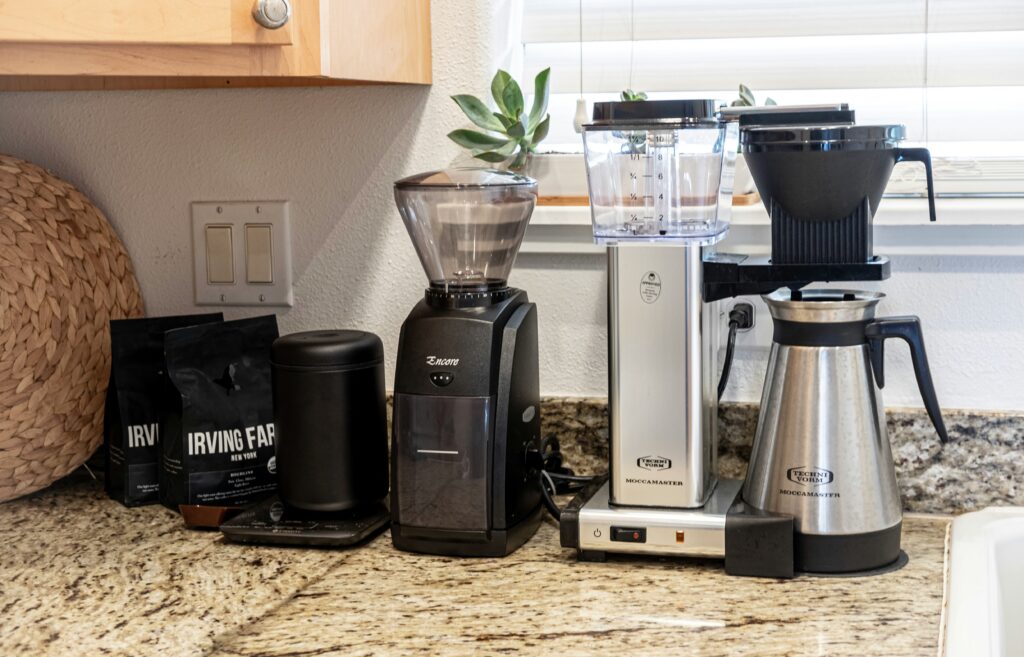
Manual grinders require the same level of attention as electric models.
The process typically includes:
- Remove the handle.
- Unscrew the adjustment knob.
- Remove the burr assembly.
- Brush every component.
- Wipe away coffee oils.
- Dry thoroughly.
- Reassemble carefully.
Because manual grinders have fewer electrical parts, they are often easier to clean completely.
Cleaning Commercial Coffee Grinders
Coffee shops and offices place much greater demands on grinders than home users.
Commercial grinders often require:
- Daily brushing
- Weekly deep cleaning
- Routine burr inspection
- Regular calibration
- Professional servicing when necessary
Large volumes of coffee create significantly more residue, making consistent maintenance essential for maintaining drink quality.
How to Remove Lingering Coffee Odors
Sometimes a grinder develops lingering smells from:
- Flavored coffee
- Dark roasts
- Spices
- Oily beans
If odors persist:
- Brush thoroughly.
- Wipe removable parts.
- Use approved grinder cleaning pellets.
- Allow the grinder to air out before reassembly.
Avoid using scented cleaning products, as they can transfer unwanted flavors to future coffee.
Troubleshooting Common Grinder Problems
Even a well-maintained grinder can occasionally develop issues.
Grinder Produces Uneven Grounds
Possible causes include:
- Dirty burrs
- Worn burrs
- Improper burr alignment
- Coffee residue affecting adjustment settings
A thorough cleaning is often the first thing to try before replacing any parts.
Grinder Feeds Beans Slowly
Bean flow may be restricted by:
- Oil buildup
- Blocked hopper
- Clogged burr chamber
Cleaning the hopper and burr assembly often restores normal operation.
Grinder Is Louder Than Usual
Excessive coffee buildup can increase grinding noise.
If cleaning doesn’t help, inspect for worn burrs or loose components according to the manufacturer’s guidance.
Grinder Stops Grinding
Possible causes include:
- Jammed beans
- Foreign objects
- Excessive coffee residue
- Motor overheating
Always unplug the grinder before investigating.
Never force jammed burrs by hand.
Expert Tips for Keeping Your Coffee Grinder in Excellent Condition
Professionals who work with coffee equipment often recommend several simple habits that significantly improve grinder performance.
Buy Fresh Beans Instead of Oily Beans
Extremely oily beans leave behind more residue.
While they’re perfectly usable, they often require more frequent cleaning.
Don’t Store Beans in the Hopper
Many people leave beans inside the grinder for convenience.
However, prolonged exposure to:
- Light
- Oxygen
- Heat
reduces bean freshness and allows oils to coat hopper surfaces.
Instead, store beans in an airtight container and fill the hopper only with what you’ll use in the near future.
Brush After Every Few Uses
A quick 30-second brushing removes most loose coffee particles before they become compacted.
This simple habit dramatically reduces deep-cleaning time.
Replace Burrs When Necessary
Even perfectly cleaned burrs eventually wear out.
Signs include:
- Slower grinding
- More coffee fines
- Less consistent grind size
- Longer brew times
Replacement intervals depend on grinder quality, usage, and burr material.
Best Practices for Long-Term Grinder Care
Best Practices for Long-Term Grinder Care and other home and kitchen improvement tips
Learning how to clean a coffee grinder is only one part of maintaining it. Good daily habits also play an important role in preserving both flavor and performance.
Consider these best practices:
- Brush away loose grounds after each use.
- Perform a deep cleaning regularly based on usage.
- Store beans separately in an airtight container.
- Avoid exposing the grinder to excessive moisture.
- Use only manufacturer-approved cleaning products.
- Inspect burrs periodically for wear.
- Clean the grounds container frequently.
- Wipe the exterior to prevent dust buildup.
- Keep the grinder in a dry location away from steam.
A clean grinder consistently produces better-tasting coffee and helps extend the lifespan of the machine.
Common Misconceptions About Cleaning Coffee Grinders
“If the grinder still works, it doesn’t need cleaning.”
A grinder can continue functioning while stale oils and fine coffee particles gradually affect flavor and grind consistency.
“Soap should be used on every part.”
Only removable components that the manufacturer identifies as washable should come into contact with soap and water.
“Cleaning changes the grinder’s calibration.”
Routine cleaning should not affect calibration if removable parts are reinstalled correctly.
“Coffee oils are harmless.”
Fresh coffee oils enhance the aroma, but as they age and oxidize, they can turn rancid and leave an unpleasant taste in freshly ground coffee.
“Cleaning once a year is enough.”
For regular coffee drinkers, annual cleaning is far too infrequent. Routine maintenance keeps both the grinder and your coffee performing at their best.
Conclusion
Knowing how to clean a coffee grinder is one of the simplest yet most overlooked ways to improve the quality of your coffee.It doesn’t matter how fresh your beans are orEven the most advanced coffee maker can’t produce great coffee if your grinder is full of rancid oils, trapped grounds, and debris. Not only does regular cleaning enhance your brew, but it also aids grind uniformity, prevents clogging, reduces wear and tear on your grinder’s motor and burrs, and prolongs the life of the machine. Regardless if you’re using a basic blade grinder, high-end burr grinder or a simple hand grinder, making cleaning a regular practice is crucial for a superior cup.
Grinder cleaning doesn’t necessitate advanced skills or pricey gadgets. More often than not, a stiff brush, a micro fiber cloth, and a cleaning routine will do most grinders justice, while special cleaner pellets for grinders and occasional dismantling can help you tackle a more significant job.
Ultimately, learning how to clean a coffee grinder is an investment in better coffee. By making grinder maintenance a regular habit, you’ll enjoy cleaner flavors, more consistent brewing results, and equipment that serves you reliably for years to come.
Frequently Asked Questions
1. How often should I clean my coffee grinder?
Use the brush to clear out any loose grounds every few uses, or about once or twice per week if you grind daily. As often as needed, or monthly for a less frequent user, should suffice for deeper cleans.
2. Can I wash my coffee grinder with water?
Only certain removable parts should be washed with water, and only if the manufacturer specifically permits it. Keep the motor base and all electrical components out of the water at all times.
3. What happens if I don’t clean my coffee grinder?
Old coffee oils and trapped grounds can become rancid over time, leading to stale flavors, inconsistent grinding, reduced performance, and potentially shorter grinder lifespan.
4. Are grinder cleaning tablets worth using?
Many coffee people swear by them for clearing the coffee oils, fine coffee bits, and just general stuff from corners where normal brush access is quite limited. That being said, be sure that the cleaning product you are considering using is compatible with your grinder..
5. Can I use rice to clean my coffee grinder?
Most manufacturers would tell you not to do this at all, though particularly for burr grinders. It can put extra strain on a grinder’s moving parts and leave starchy residue. Grinder cleaning pellets designed specifically for the job will usually be more reliable.
6. Why does my grinder still smell like old coffee after cleaning?
Lingering odors can point to unseen oil buildup in the burr chamber, grind chute orhopper, deeper cleaning and use of approved cleaning pellets will get rid of these persistent aromas
7. How do I know if my burrs need replacement instead of cleaning?
Signs You Have Worn Burrs if you have done everything above for cleaning the grinder and the results of a new cleaning still produce grinds that are inconsistent, a large amount of fines, are taking longer to grind, or just don’t have the output it once had, chances are your burrs are going. See your manufacturer’s recommended cleaning schedules.
Key Takeaways
| Topic | Key Point |
| Why cleaning matters | Removes stale oils and coffee residue that affect flavor. |
| Daily maintenance | Brush out loose grounds and empty retained coffee regularly. |
| Deep cleaning frequency | Every 1–4 weeks depending on usage level. |
| Blade grinders | Easier to clean but still require regular maintenance. |
| Burr grinders | Need more detailed cleaning to maintain grind consistency. |
| Water use | Only use on approved removable components. |
| Rice cleaning method | Often discouraged by grinder manufacturers. |
| Best results | Combine routine brushing with periodic deep cleaning. |